Showing posts with label Techniques. Show all posts

Wednesday, July 16, 2014

Finishing a cross stitch bookmark

How to finish a cross stitch bookmark when not working with already prepared bookmark fabric:

that's
no moon bookmark


Before you start stitching, be sure to cut your fabric with at least 9 extra squares on each side for finishing.


bookmark 1
blanket stitch


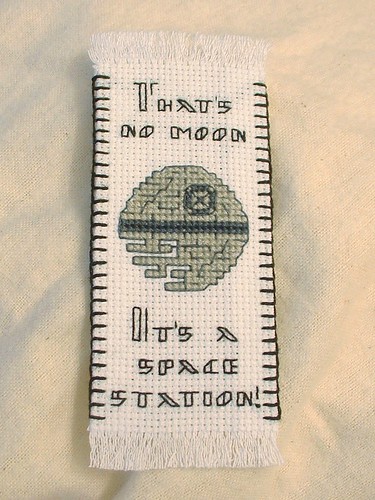
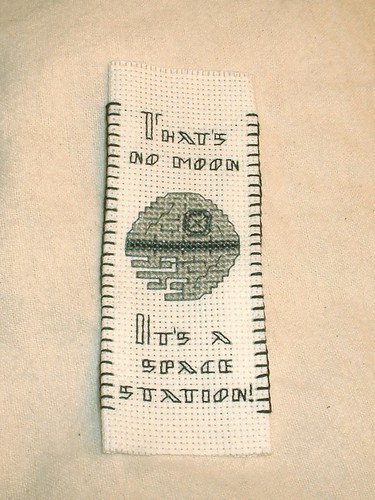
Stitch your bookmark pattern, then fold the sides to the back leaving 3-4 empty squares on either side of the stitching. Tack the edges down - you can use a blanket stitch like I did, or a simple running stitch, or any decorative stitch as long as it isn't too bulky.


bookmark 2
fringe


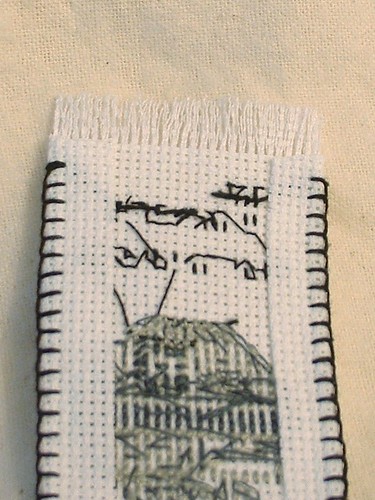
Flip the bookmark over and carefully trim the corners. Then pull out the horizontal threads to create a fringe. Be sure to leave at least three empty squares between the fringe and the stitching.


bookmark 3
wash


bookmark 4
iron


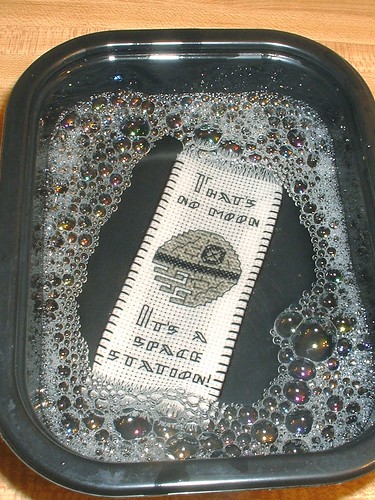
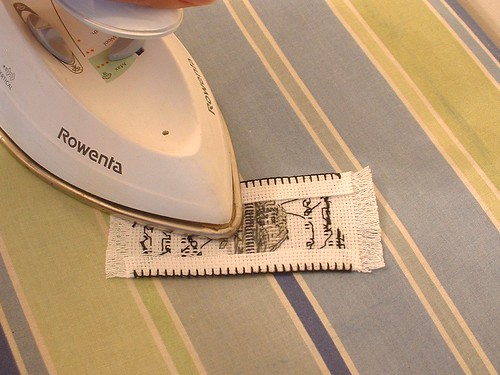
Wash and Iron your bookmark. Remember to keep the bookmark face down so that you do not crush the stitches.


bookmark 5
felt


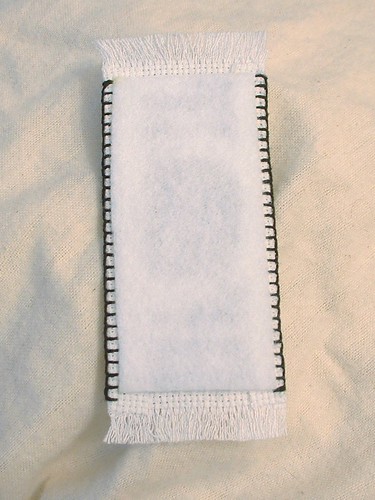
Carefully glue a piece of felt over the back of the bookmark to protect the back of your stitching.


Enjoy your new bookmark!!


that's
no moon bookmark


(Cross stitch chart for this bookmark is available here)


Friday, May 20, 2011

recabled

Wow, where does the time go?

No FOs yet.

But I do have a few things in the works, and there is something to show today.

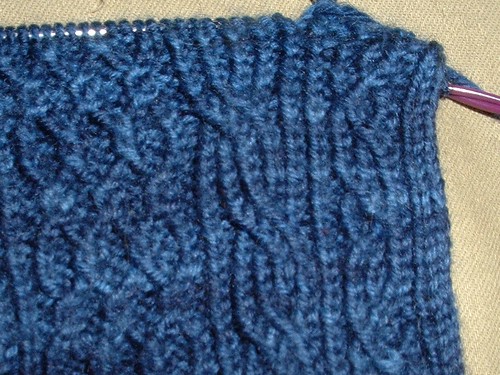
A little while ago while I was working on my toe up Bayerichies I noticed a miss crossed cable!

cable fix 03-13-11 1

Oh the horror!

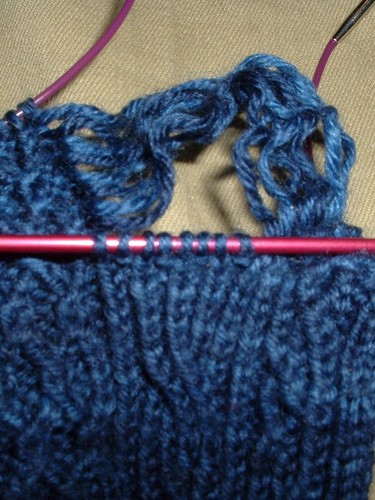
But it's ok! I just dropped back...

cable fix 03-13-11 2

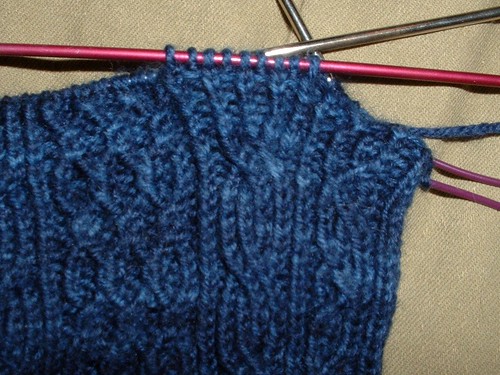
And re-knit!

cable fix 03-13-11 3

All better!

I have some other things to write about, but no time today, hopefully the next update will come a little sooner than this one did!

Thursday, September 18, 2008

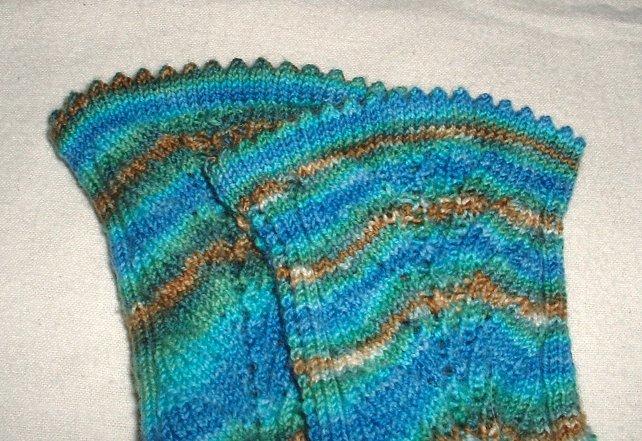
Toe up or bind off picot hem tutorial

toeuppicohemtutorial 14 on

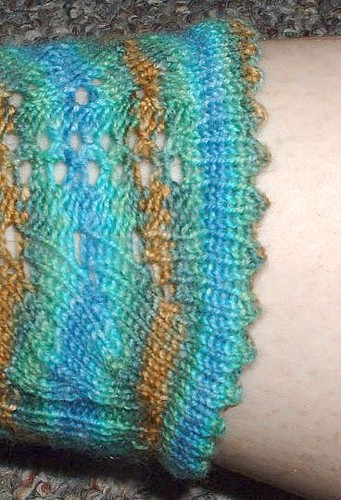
I love the look of picot hems, but I've always knit my socks toe up, and I didn't know there was a way to do it that way until I stumbled upon the fiber fool's entry about that exact thing her swatch # 4 was perfect, so I decided to give it a try. Unfortunately even though she does tell how it is done. I still managed to mess up quite a few times before getting it right. And since I couldn’t find any good tutorials on this particular method, I decided to make my own in case other people would like to do it this way as well.
Enjoy!


After you finished knitting the main art of your sock it’s time to make the hem.
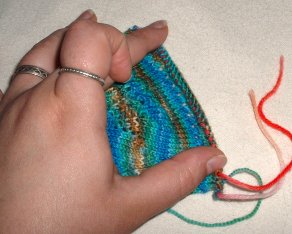
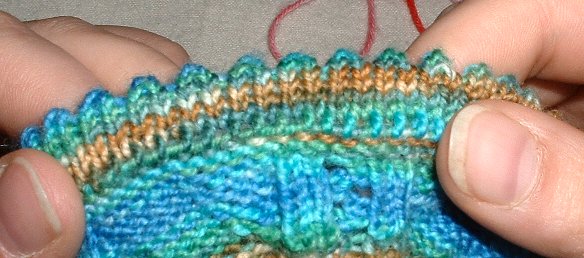
Begin by knitting 7 plain rounds, then *yo, k2tog* around, then 6 more plain rounds.
You can make the hem as deep as you like, but you always want the section above the yo round to be one less then the section below.


Once you have knit the picot hem. Place all the stitches on a piece of waste yarn, this will make it easier to sew and to see what you are doing.
toeuppicohemtutorial 01 threded


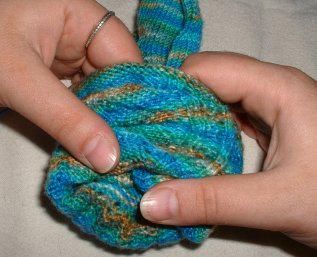
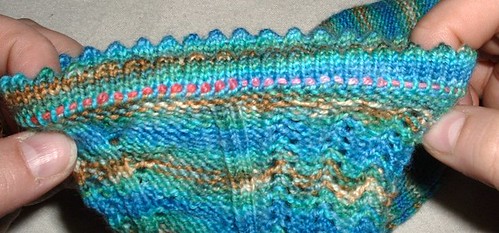
Turn your sock inside out. fold down the hem so that you are pleased with the way your picots look, make a note of where the edge lands, this is the purl row you will be sewing into.
toeuppicohemtutorial 02 inside out


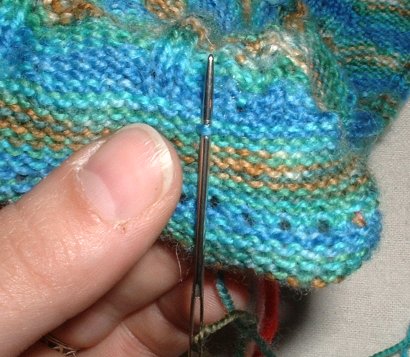
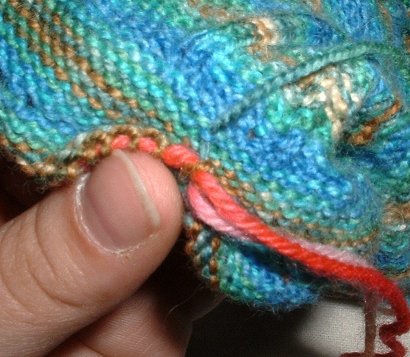
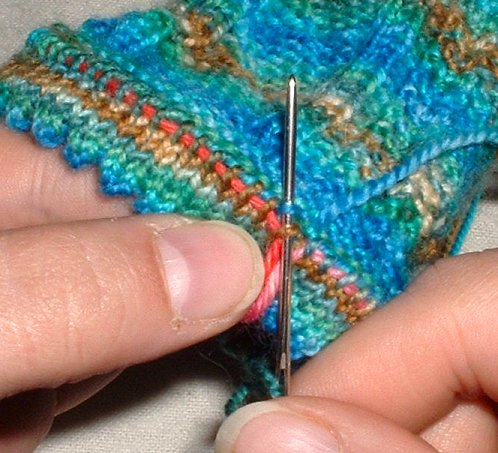
Using your yarn tail, which you cut to 2 – 3 times the circumference of your sock, sew purl-wise through the first live stitch.
toeuppicohemtutorial 03 first stitch


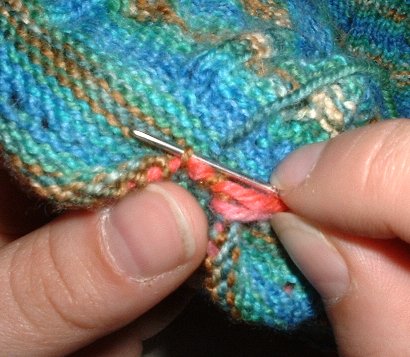
Then sew through the purl bump on the previously noted row that falls below your first stitch.
You will be sewing from the top downwards.
toeuppicohemtutorial 04 first stitch purl


Pull the yarn snug, but not too tight
toeuppicohemtutorial 05 first stitch finish


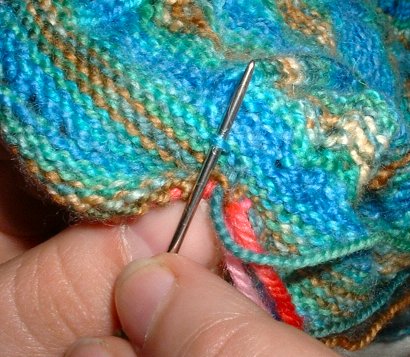
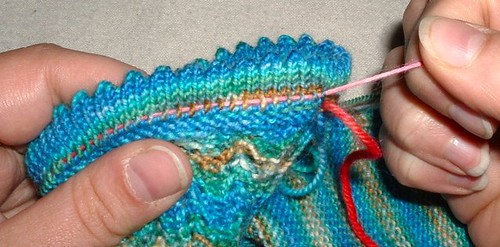
Continue in this manner: purl wise through the next stitch, then top to bottom through the next purl bump.
toeuppicohemtutorial 06 through the stitch
toeuppicohemtutorial 07 through the purl


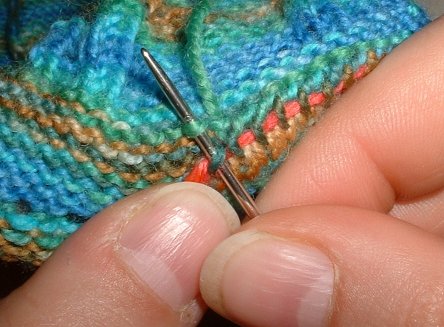
After a few stitches, I find it faster to sew through both the stitch and the bump at the same time.
toeuppicohemtutorial 08 alternate stitch


After you have finished sewing the entire hem. Sew once more through the first stitch and it's corresponding purl bump to finish off.
toeuppicohemtutorial 09 last stitch


To make sure that your hem will be stretchy enough to get on, give it a good stretch before weaving in the ends.
toeuppicohemtutorial 10 stretch


Remove the waste yarn, by simply pulling on one end, it should slide freely out of your hem.
toeuppicohemtutorial 11 pull


and admire your spiffy sewing job.
toeuppicohemtutorial 12 seam


and there you go. If you have any questions or comments feel free to ask.
Tomorrow there will be more details on pattern, yarn, and pictures of these new socks actually on my feet. But Bill isn't home today, and no matter how I try all my modeled pictures look really crappy.

toeuppicohemtutorial 13 done

Tuesday, August 12, 2008

More spinning

I recently learned a new spinning technique called "ply on the fly" essentially you spin a length of singles, then Navajo ply it all at once before winding it onto the spindle. If you are interested there's a video here that shows how to do it.

I really like it because plying this way is (to me) about 10000 times easier than doing it the traditional way of winding the singles into a ball from the spindle and then trying to ply it from there.

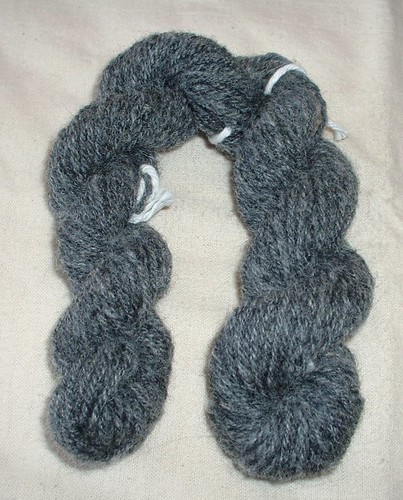
When some beautiful grey roving came my way from one of the teachers of my spinning class I saw it as the perfect opportunity to practice my 'ply on the fly' skills.

greywoolfromcanada hank

The original bump of roving was about 3 oz. This skein is only about half of that. I decided to save the rest to practice my wheel spinning tomorrow when I go to the museum for spinning and weaving day. (Every Wednesday, a bunch of ladies get together to weave and spin)

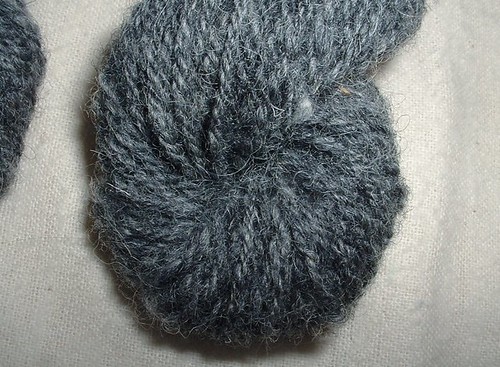
greywoolfromcanada closeup
( I love this picture, I made it my new desktop for a while.)

stats:
unlabeled roving from Upper Canada Village it’s very crimpy and there was still a lot of grease left in it, but it spun very easily, and while not amazingly soft, made a nice yarn.

Spun on my big spindle, using "ply on the fly" technique.

Fingering.dk weight, about 48 yards.

My spinning skills are getting much better lately, not only was I trying out a new technique, but this was the most even and most balanced skein I've spun so far.


And while we are on the topic of spinning...

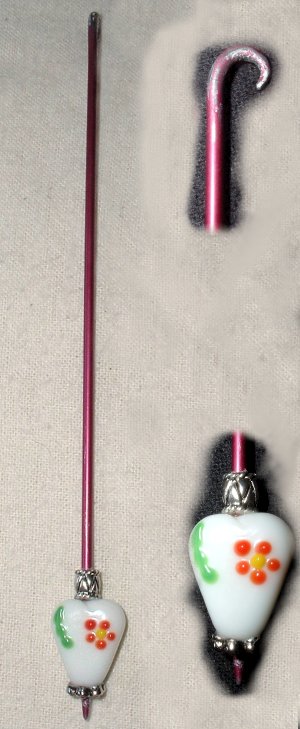
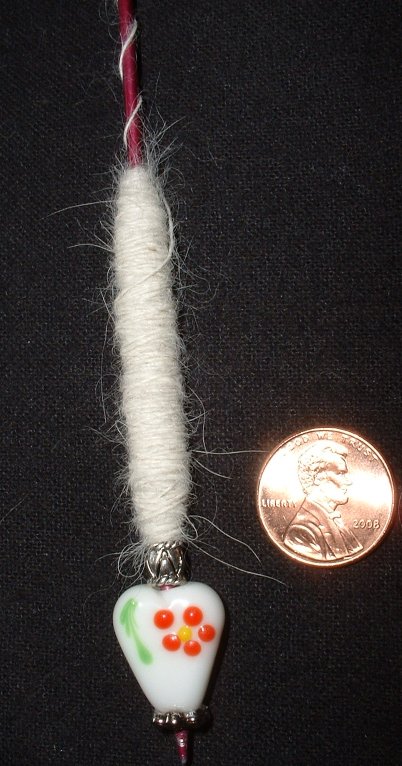
I've wanted a takli or support spindle for a while. Then I found a group on ravely called DIY tools and got inspired:

homemadehearttakli

It's made from a heavy lampwork glass heart, and two metal beads from my beading stash. Glued onto a US #1 DPN.
The hardest part was bending the hook on the end. And then I had to file it down a bit to smooth it out.

It spins pretty well. I'm still getting used to the whole supported spindle thing. But so far so good.

homemadehearttakli spun

The fiber on it in the picture is Chiengora from the resident fiber dog Cayenne, 'carded' using a pair of dog brushes.

After a while I Navajo plied it up on my golding tsunami, and the resulting yarn is some of the softest and finest I've spun for cayenne's fun yet.

Monday, January 14, 2008

Geek du chĂȘne

While I was working on the Okie Dokie doily yesterday I began to wonder how far along I was.
I mean I could look at the pattern and see how many rows were left.
But those rows were getting bigger and bigger, and I wanted to know exactly what percentage I had left.

So I turned to the resident geek (aka my husband) and asked him how I would go about figuring it out. In no time he had a simple little formula for me. This formula works if you are knitting a center out circular or rectangular shawl/blanket, it works if you are knitting a tip up triangular shawl, and it works if you are knitting a center neck out triangular shawl, essentially, if you start with a tiny number of stitches, and end with a huge number of stitches, this formula will work. (This does not count Faroese style shawls, there's funky shaping involved that the formula doesn't account for.)

(Rows already knit)²
(Total Rows in project)²

all that x 100 = the percentage finished.


So how far along am I with Okie dokie?

55² ÷ 123²=.199

.119 x 100 = 19.9%

yeah... I need to get knitting.


{ETA}
If you want to be extra geeky with this, try typing it into Google.

((55^2) / (123^2)) x 100

Monday, December 18, 2006

The Thumb Trick:

Sometimes called an afterthought thumb, I first read about it in Elizabeth Zimmermann's Knitter's Almanac.


This method is used in fetching but it is also very common in a lot of stranded, and Norwegian style type mittens.

I really like this method because it's seamless; sometimes when patterns have you place stitches on a holder and then cast on the top stitches you can get an odd seam right in the crease where your thumb meets the hand, and that can be uncomfortable.

The only trouble that some people may have with this method is that you cannot immediately try on your mitten in progress, as you can with mittens where the stitches are put on holders. But if you want to you can just knit a few more rows and then pick up the stitches instead of waiting until the mitten is done, threading the waste yarn through them so you can try on your mittens as you knit.


The trick:
Knit to where you want to place the thumb hole, and take a length of contrasting yarn, and knit the thumbhole stitches with it instead of your working yarn:
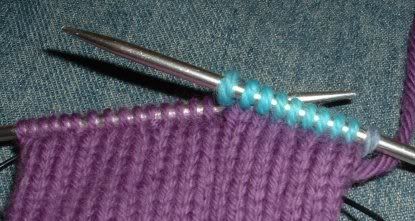
Photobucket
(see the working yarn, still on the right-hand side of the work?)


Then, slip all these stitches back onto your left hand needle purl wise:
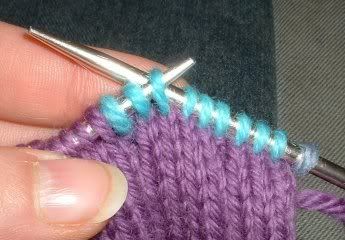
Photobucket

Photobucket


And knit across them, with your working yarn:
Photobucket

Here are the held stitches after a few rows have been worked:
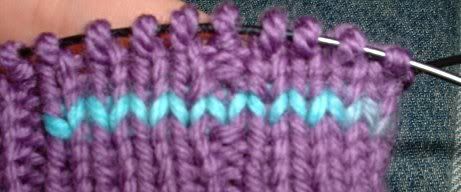
Photobucket


(Fetching uses a ribbed pattern. When knitting with the waste yarn, just knit plainly, and when knitting back across the waste yarn, knit plainly again, then pick up any stitch patterns again once you've passed the thumb. If using colour patterns, they can be resumed right away as you are knitting over the waste yarn. It is just easier to pick up the stitches later if they are all knit.)


Finish the mitten, and then turn it inside out:
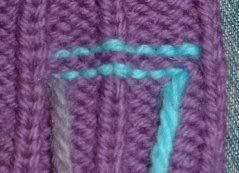
Photobucket

See the purple bumps in-between the blue bumps? Those are the stitches you'll be picking up.


Start picking up the stitches using a pair of circular needles:
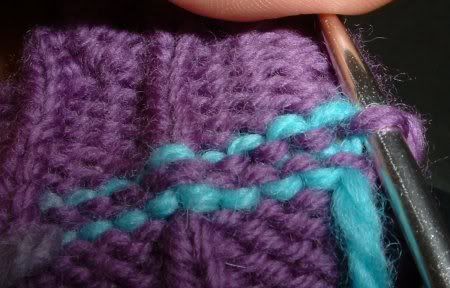
Photobucket


As it begins to get awkward to fit them on the needle, slide them onto the cord and continue picking up all along the top edge:
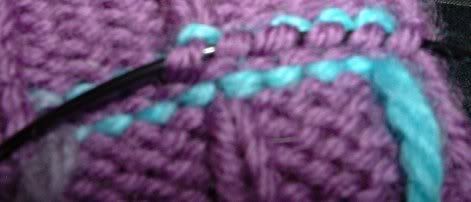
Photobucket


When you get to the end of the row, there will be a stitch where the waste yarn only holds half of it; you want to pick that stitch up too:
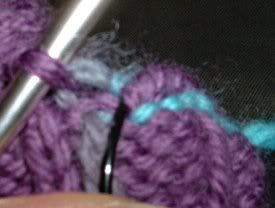
Photobucket


Then just turn the work upside down, and keep picking up the underside stitches too:
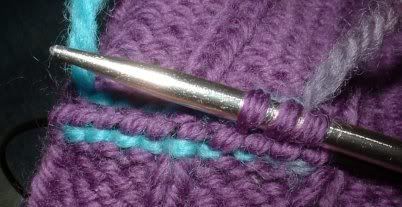
Photobucket

Keep a loop of the circular cord at the end, to separate the two sides.


Here it is with all the stitches picked up:
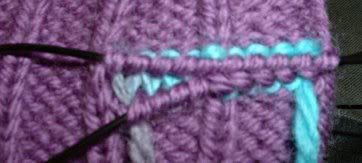
Photobucket

The top row will have one more stitch than was originally knit onto the waste yarn, and the bottom should have as many as was originally knit.
Usually, patterns will say that after picking up stitches you'll have one side equal, and one side with one less stitch, but I find that the method I use results in fewer holes.


Now, start puling out the waste yarn, with no worries of a dropped stitch, since they are all already on the needles!
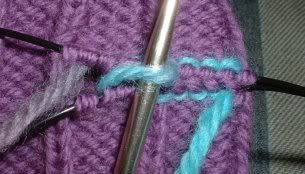
Photobucket


Here it is with the waste yarn removed, and all the now live stitches on the needles:
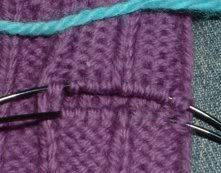
Photobucket


Pull the cord of the needle until there isn't a loop at the end anymore:
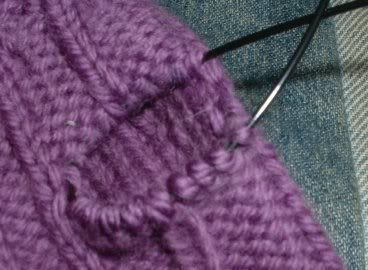
Photobucket


Stick the needles into the thumb hole and out of the mitten:
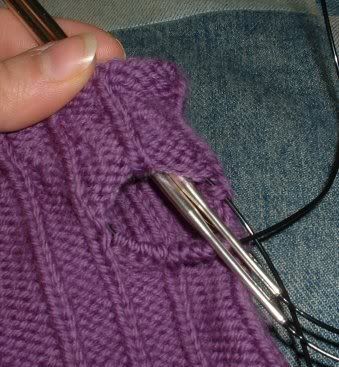
Photobucket

(The fetching are open at the top, so I stuck them out the top, if making a closed top mitten, just send them out the wrist.)


And pull them out, flipping the mitten right side out in the process:
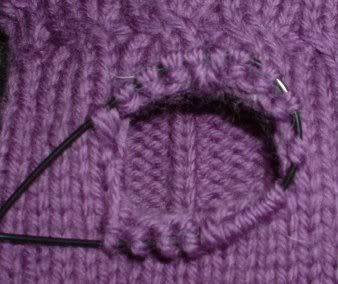
Photobucket
Ta da! You are almost ready to start knitting your thumb!


I like to make sure the top and bottom are equal in stitch count, and it really helps to tighten things up and prevent holes if one more stitch is picked up and put on bottom needle:
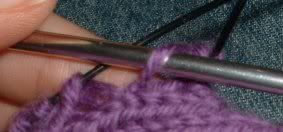
Photobucket
If things are still a bit loose at the sides of the thumbhole, just pick up one more stitch at each end and knit it together with the next stitch on each needle on your first round.
From here you can either move all the stitches to DPNs or you can keep up with the circulars and knit the thumb magic loop style.
Knit your first round through the back loop for extra security and tightness, to further help prevent holes.
If doing colour work that requires a certain number of stitches, simply decrease or increase evenly along your first row to achieve that number.
Friday, October 27, 2006

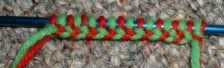
Braided Cast on

Braided cast on:
Photobucket - Video and Image Hosting

I love this cast on; it creates a lovely braided effect that is stunning on mittens or hats. It's perfect for two colour knitting, no need to fumble to add the second colour, it's already there! And it sets up your stitches perfectly for corrugated ribbing!

The site where I originally learned this technique did a terrible job at explaining it, and it took me forever to figure it out. I decided to make a better set of instructions after several people asked me how I did it.


**This cast on uses a modified version of the long tail cast on**
Tutorials can be found here: http://www.knittinghelp.com/knitting/basic_techniques/ (video)
Or here: http://www.butlercountryknit.com/longtail.pdf (PDF)
Or here: http://www.knitty.com/ISSUEsummer05/FEATsum05TT.html (scroll down)

Step 1:
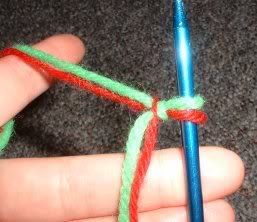
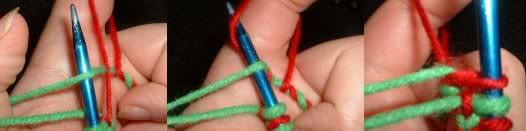
Make a slip knot using two colours of yarn held together, place the knot on your needle. Hold the free ends out of the way.
Photobucket - Video and Image Hosting

Step 2:
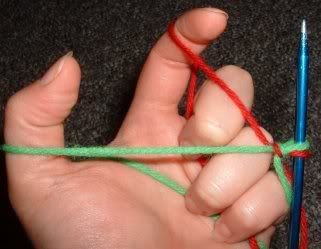
Hold the yarn colour at the top side of the needle (green) around the front and then back of your thumb, with the tail hanging down the palm of your hand.
Hold the colour at the bottom end of your needle (red) around the front and then back of your index finger, with the tail hanging down the palm of your hand.
Hold the tails out of your way using the other three fingers of your hand.
Photobucket - Video and Image Hosting

Step 3:
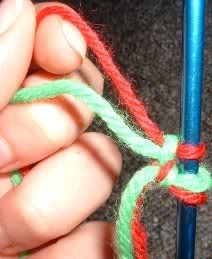
Put the needle under and up through the palm side yarn coming from around your thumb, grab the front yarn going around your index finger and pull it through.
Photobucket - Video and Image Hosting

Step 4:
Release the yarn from around your thumb and tug at both yarns to snug the loop around the needle.
Photobucket - Video and Image Hosting

Step 5:
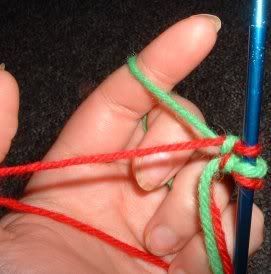
Move the index finger (red) yarn OVER the thumb (green) yarn and place on your thumb; place the other (green) yarn around your finger as before. (Always move the top (finger) yarn OVER the bottom (thumb) yarn to create the braided effect)
Photobucket - Video and Image Hosting

Repeat step 3-5 until as many stitches as needed are cast on.
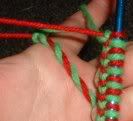
Your yarn will begin to twist after a few stitches are made, don't worry, this is normal, just ignore it, or stop periodically and let your needle hang to untwist the working yarns.
twisty:Photobucket - Video and Image Hosting

If you have any questions or if anything is unclear, let me know and I'll try to explain better.
Enjoy!
:D

Powered By Blogger

Creative Commons

Creative Commons License
This blog and everything contained within is licensed under a Creative Commons Attribution-NonCommercial-NoDerivs 2.5 License.